Why a Proper Garbage Disposal Set Up Makes All the Difference
Getting your garbage disposal set up correctly from the start saves you from headaches like leaks, electrical problems, and drain backups down the road. Whether you are replacing an aging unit or installing one for the first time, the process is more approachable than most homeowners expect.
Here is a quick overview of how to set up a garbage disposal:
- Turn off power at the circuit breaker before touching anything
- Remove the old unit by disconnecting the drain pipe and rotating the mounting ring counterclockwise
- Install the sink flange using fresh plumber’s putty for a watertight seal
- Wire the new unit by connecting white to white, black to black, and green to ground
- Connect the plumbing including the discharge elbow, P-trap, and dishwasher drain line if applicable
- Test for leaks by filling the sink with water and checking all connections before restoring power
Most homeowners with basic DIY comfort can complete this project in one to three hours. Garbage disposals typically last between 8 and 15 years with proper care, so a careful installation pays off for a long time. And while professional installation is always an option if the job feels out of reach, this guide will walk you through every step with clarity.
I am Chris Woods, owner of Woods Comfort Systems, a third-generation home services company with decades of hands-on experience helping Central Texas homeowners with everything from HVAC to plumbing, including garbage disposal set up and repair. In the sections below, I will walk you through exactly what you need to do this job safely and confidently.

Essential tools and materials for a garbage disposal set up
Before you crawl under your kitchen sink, you need to gather the right gear. There is nothing more frustrating than being halfway through an appliance installation only to realize you do not have the right size pliers or enough sealant to finish the job. Having your tools lined up makes the entire process run smoothly.
For a successful garbage disposal set up, make sure you have the following tools and materials on hand:
- Screwdrivers: You will need both a flathead screwdriver and a Phillips-head screwdriver to tighten the mounting screws and secure the hose clamps.
- Adjustable pliers: A sturdy pair of channel-lock pliers is essential for tightening plumbing connections and securing the drain lines.
- Plumber’s putty: This clay-like sealant is crucial for creating a watertight barrier between the sink drain and the new sink flange.
- Wire nuts and electrical tape: These are necessary for securing the electrical wire connections safely inside the unit’s bottom compartment.
- Non-contact voltage tester: This safety tool ensures there is absolutely no electrical current running through the wires before you begin handling them.
- Hammer and wooden dowel (or steel punch): You will need these simple tools to knock out the plastic drain plug if you plan to connect your dishwasher to the disposal.
- Safety gear: Always wear safety glasses to protect your eyes from falling debris under the sink, and work gloves to protect your hands from sharp metal edges.
- A bucket and old towels: Water is bound to spill when you disconnect the old drain pipes, so having a bucket and towels nearby will protect your kitchen cabinet from water damage.
While many homeowners find this to be a manageable intermediate DIY project, it does require a basic comfort level with plumbing configuration and electrical wiring. If you look under your sink and feel overwhelmed by the maze of pipes and wires, it is always a smart choice to call in a professional for an expert plumbing installation to ensure everything meets local building codes.
Step 1: Safely removing your old garbage disposal
If you are replacing an existing unit, the first major step is removing the old, worn-out appliance. Safety must always be your top priority when working on any appliance that combines water and electricity.
To start, head over to your main electrical service panel and shut off the power to the circuit breaker that controls your garbage disposal. Even if your disposal plugs into an outlet under the sink, turning off the breaker adds an extra layer of protection. Once the breaker is switched off, flip the disposal wall switch on and off to verify the power is completely dead. For ultimate safety, use a non-contact voltage tester on the wires under the sink to confirm there is no live current.
Next, place your support bucket directly beneath the plumbing connections. Use your adjustable pliers to disconnect the P-trap and the drain pipe connected to the disposal’s discharge tube. Be prepared for a small amount of standing water to drain out of the pipes when you loosen these connections. If your dishwasher drains into the disposal, loosen the hose clamp securing the dishwasher line and slide the hose off the inlet tube.
With the plumbing disconnected, you can now remove the old disposal unit. These appliances can weigh up to 20 pounds, so it is a good idea to support the bottom of the unit with your hand, a small car jack, or a sturdy box. Locate the mounting ring at the top of the unit where it connects to the sink flange. Insert a flathead screwdriver or the wrench provided with your new unit into one of the mounting ring tabs and rotate it counterclockwise. This will release the disposal from the mounting assembly, allowing you to lower it carefully out of the cabinet.
If you are replacing a unit because it stopped working, it is worth noting that some issues can be resolved without a full replacement. Learning the signs of a failing motor versus a simple jam can help you decide when to replace the unit or when it is time to look into knowing when to schedule a garbage disposal repair to save on replacement costs.
Step 2: Preparing the sink flange and mounting assembly
With the old unit out of the way, you can now prepare the sink for the new installation. The sink flange is the metal collar that sits inside the sink drain opening, holding the mounting assembly in place beneath the sink.
Start by removing the old sink flange. Push it up through the drain hole from under the sink. Once the old flange is removed, you will likely see a ring of old, crusty plumber’s putty stuck around the drain opening. Use a plastic putty knife or a non-scratch scrub pad to scrape away every bit of this old sealant. The sink surface must be completely clean, dry, and smooth to ensure the new putty adheres properly and creates a perfect seal.
Next, take apart your new mounting assembly. Out of the box, these parts are usually pre-assembled. You will need to loosen the three mounting screws on the mounting ring until they are nearly flush with the ring. Use a flathead screwdriver to pry off the metal snap ring, which will allow you to separate the backup ring, the fiber gasket, and the mounting ring from the sink flange. Keep these parts laid out in the exact order they were removed so you can easily reassemble them under the sink.

Applying plumber’s putty for a secure garbage disposal set up
Using the right sealant is the secret to avoiding slow, damaging leaks under your kitchen sink. While some modern kits come with rubber gaskets for the top of the sink, traditional plumber’s putty remains the industry standard for creating a reliable, long-lasting watertight seal.
To apply the putty, take a generous handful and roll it between your palms to create a consistent, rope-like shape about 3/8-inch thick. Lay this putty rope in a continuous circle around the underside of the new sink flange. Lower the flange straight down into the clean sink drain opening, pressing down firmly with both hands. This pressure will cause some of the excess putty to ooze out around the edges of the flange in the sink basin, which is exactly what you want to see because it proves you have a complete seal.
From beneath the sink, slide the fiber gasket and the metal backup ring up onto the flange. The fiber gasket protects the bottom of your sink from the metal backup ring. Hold these in place while you slide the mounting ring up and snap the metal snap ring back into the groove on the flange. Once the snap ring is securely in place, tighten the three mounting screws evenly and incrementally. As you tighten them, more putty will squeeze out inside the sink. Crawl back up and use your plastic putty knife to scrape away the excess putty, returning any unused portion to its container.
A poorly sealed flange is one of the most common household plumbing problems that homeowners face after a DIY installation. Taking your time during this step ensures your cabinets stay dry and mold-free.
Step 3: Wiring and mounting the new unit
Before you hang the heavy disposal unit onto the mounting assembly, it is much easier to handle the electrical wiring while the unit is sitting on your kitchen floor or counter.
Turn the new disposal upside down to access the electrical compartment on the bottom. Remove the metal cover plate to expose the loose wire leads. You will need to install a strain relief clamp into the hole on the compartment cover to protect the electrical cord from rubbing against the sharp metal edges of the unit. Feed the electrical cord or the house wiring through the strain relief clamp and tighten the clamp screws.
Once the wiring is complete, you are ready to mount the disposal to the sink. Lift the unit up to the mounting assembly under the sink. Align the three mounting tabs on the disposal’s lower mounting ring with the ramped slides on the upper mounting ring. Rotate the lower mounting ring clockwise until all three tabs slide up the ramps and lock firmly into place. You can use a screwdriver or the mounting tool inserted into one of the ring loops to pull the ring tight until it clicks or locks securely.
For model-specific details and diagrams, always consult the manufacturer’s installation manual included with your specific appliance.
Completing the electrical connections for your garbage disposal set up
Whether your home uses a direct hardwired connection or a standard three-prong wall outlet, electrical safety is paramount.
If your kitchen uses a plug-in setup, you will need to install a new appliance power cord to the disposal. If you are hardwiring the unit directly to a Romex or BX cable coming out of the wall, make sure you use proper wire connectors. Connect the white neutral wire from the power cord to the white wire inside the disposal, and connect the black hot wire to the black disposal wire.
Secure these connections with plastic wire nuts and wrap them with electrical tape for added security. The green or bare copper grounding wire must be connected to the green grounding screw inside the electrical compartment. Once all wires are tucked neatly inside, replace the metal cover plate and tighten the screw.
If you are installing a modern unit with simplified connection options, you can refer to the manufacturer’s EZ Connect installation support guide to learn how to utilize specialized quick-connect wiring harnesses and adapters that make electrical hookups faster and safer.
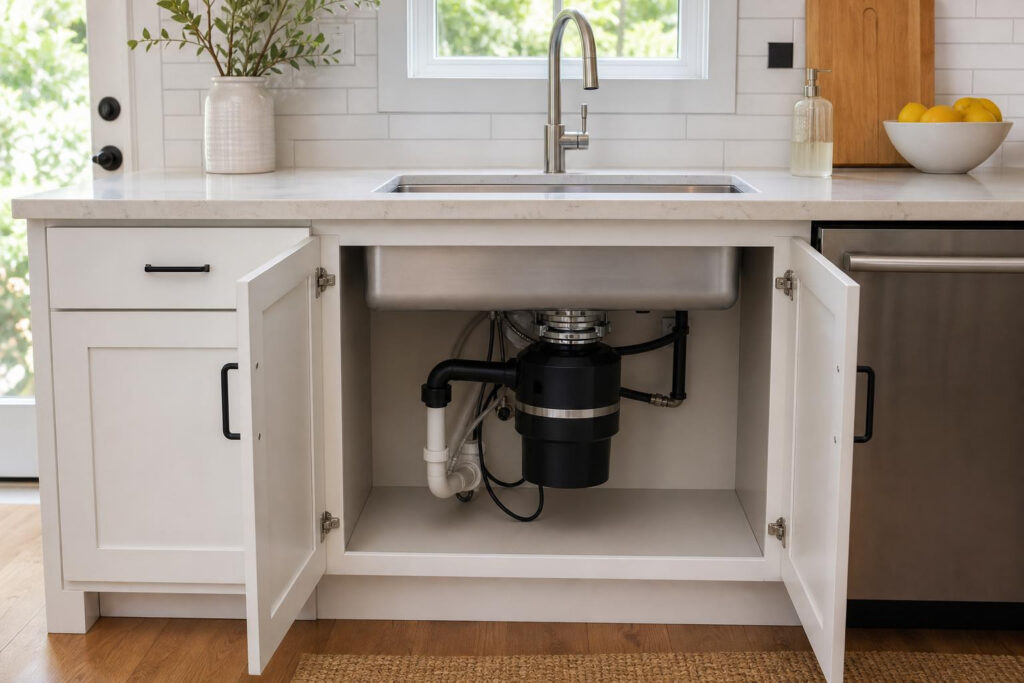
Step 4: Connecting plumbing, drain lines, and dishwashers
With the disposal securely mounted and wired, it is time to hook up the plumbing lines. Your new unit will come with a plastic discharge elbow, a rubber gasket, and a metal flange or spring clamp to secure it to the disposal’s waste outlet.
Install the rubber gasket onto the discharge elbow, insert the elbow into the disposal’s outlet port, and tighten the screws or clamp to hold it in place. Align the other end of the discharge elbow with your existing P-trap. If the new elbow does not line up perfectly with your old plumbing, you may need to use a hacksaw to trim the plastic pipes or purchase a flexible slip-joint adapter to bridge the gap. Ensure all plumbing connections have a slight downward slope to allow water to drain efficiently.
If you have a dishwasher, you must connect its drain hose to the disposal. This is where many DIYers make a critical mistake: inside the disposal’s dishwasher inlet tube, there is a factory-installed plastic knockout plug. If you do not remove this plug, your dishwasher will not be able to drain, leading to standing water in your dishwasher basin.
To remove it, place a screwdriver or a wooden dowel against the plug inside the inlet tube and tap it firmly with a hammer until the plug pops out into the main grinding chamber of the disposal. Reach inside the disposal from the top sink opening and remove the loose plastic slug before proceeding. Slide the dishwasher drain hose onto the inlet tube and secure it tightly with a metal hose clamp.
Improper drain alignment or forgetting to remove the knockout plug can cause serious backups and water damage, which are common residential plumbing problems in San Marcos, TX that our team regularly resolves for local homeowners.
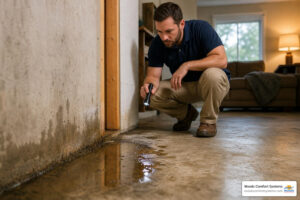
Step 5: Testing for leaks and securing the installation
Now that all plumbing and electrical connections are complete, it is time to test your handiwork. Do not turn the circuit breaker back on just yet. First, we need to run a wet test to ensure there are no slow leaks.
Place a dry towel or a shallow baking sheet directly under the disposal and all pipe connections. Insert the sink stopper into the drain and fill the sink basin about halfway with water. Once filled, pull the stopper out to release a large volume of water down the drain all at once. This creates high pressure inside the pipes, which is the best way to catch any weak seals or loose joints.
Crawl back under the sink with a flashlight and carefully inspect the following areas for any signs of moisture:
- The connection between the sink flange and the bottom of the sink
- The joint where the discharge elbow connects to the disposal body
- The connection points on the P-trap and the main wall drain
- The dishwasher drain hose connection
If you spot any drips, try tightening the loose slip-nuts or mounting screws slightly. If the leak persists at the sink flange, you may need to disassemble the mounting ring and apply a thicker rope of plumber’s putty. Once you are confident that everything is dry and secure, switch the circuit breaker back on and run cold water while flipping the wall switch to test the motor’s operation. Listen for any unusual rattling or excessive vibration, which could indicate that the mounting ring is not fully locked into place.
Taking the time to perform these final checks prevents water damage and ensures you will not need to deal with timely plumbing repairs down the road.
Frequently Asked Questions about garbage disposal installation
How long does a typical garbage disposal installation take?
For an experienced DIYer with the right tools, replacing an existing garbage disposal typically takes about one to two hours. If you are installing a disposal in a sink that has never had one before, the project can take three to six hours because it requires running new electrical wiring, installing a dedicated switch, and modifying the existing under-sink plumbing lines.
Can I perform a garbage disposal set up on any type of kitchen sink?
Most standard stainless steel, porcelain, and cast iron sinks with a standard 3-1/2 to 4-inch drain opening are perfectly compatible with a garbage disposal. However, very thin stainless steel sinks can flex or vibrate excessively under the weight of a high-horsepower motor. Additionally, heavy composite or fireclay sinks may require a specialized extended sink flange to accommodate the thicker material.
What horsepower garbage disposal do I need for my household?
The right motor size depends on your household size and how often you cook. A 1/2 HP unit is generally sufficient for light use in small households of one to two people. For larger families or frequent home cooking, a 3/4 HP or 1 HP unit is highly recommended because it offers more grinding power, resists jams better, and operates much more quietly.
Do I need to use plumber’s putty when installing a new sink flange?
Yes, plumber’s putty is highly recommended for creating a reliable, watertight seal between the flange and the sink basin. While some manufacturers include a rubber gasket as an alternative, putty conforms better to the shape of the drain opening and lasts longer. However, if you have a granite, marble, or composite sink, you should use a non-staining plumber’s putty or high-quality silicone sealant to prevent the oils in traditional putty from staining the stone.
Why is my dishwasher not draining after installing a new garbage disposal?
This is almost always caused by forgetting to remove the plastic knockout plug inside the disposal’s dishwasher inlet port. New disposals come with this plug intact to prevent water from leaking out if no dishwasher is connected. To fix this, disconnect the dishwasher hose, tap the plug out with a screwdriver and hammer, remove the plastic piece from inside the disposal chamber, and reconnect the hose.
Can I connect a garbage disposal to a septic system?
Yes, you can use a garbage disposal with a septic system, but you must be mindful of how much food waste you send down the drain. Food scraps do not break down as quickly as human waste, which can cause the septic tank to fill up much faster. If you are on a septic system, consider upgrading to a specialized septic-assist disposal that automatically injects waste-degrading microorganisms every time you run the unit.
What is the difference between a continuous feed and a batch feed disposal?
Continuous feed disposals run continuously as long as the power switch is turned on, allowing you to feed food scraps into the grind chamber while the water is running. Batch feed disposals only operate when a special stopper lid is inserted into the drain opening and turned, making them a safer option for households with curious children or pets.
How often do garbage disposals typically need to be replaced?
With proper use and regular cleaning, a high-quality garbage disposal will typically last between 8 and 15 years. Over time, the internal grinding blades can become dull, the motor can burn out, or the internal seals can fail, leading to leaks from the very bottom of the unit. On average, most homeowners only need to replace their disposal once a decade.
Should I use hot or cold water when running my garbage disposal?
You should always run cold water when grinding food waste. Cold water keeps grease and oils in a solid state, allowing the disposal blades to chop them up into tiny particles that can easily flow through the pipes. Hot water melts grease, which can then coat the inside of your drain pipes further down the line, solidify as it cools, and cause stubborn clogs.
When should I hire a professional plumber in San Marcos, TX for installation?
You should consider hiring a professional plumber if you do not have an existing electrical outlet under your sink, if your kitchen plumbing is made of older materials like lead or cast iron, or if you feel uncomfortable handling electrical wiring. A licensed plumber will ensure your installation is fully compliant with local plumbing and electrical codes, protecting your home warranty and preventing future issues.
Conclusion
Setting up a new garbage disposal is a rewarding intermediate DIY project that can instantly improve your kitchen’s convenience and help keep your sink clog-free. By following the proper safety steps, using fresh plumber’s putty for a watertight seal, and carefully making your plumbing and electrical connections, you can enjoy a reliable appliance for years to come.
However, DIY projects can sometimes present unexpected challenges. If safety concerns arise, if you find yourself lacking the specialized tools required for the job, or if you are dealing with complex plumbing and electrical systems, it is always best to step back. If you are ever unsure about performing any part of this installation correctly, do not hesitate to contact a licensed professional to avoid costly water damage or electrical hazards.
When you run into unexpected electrical complications, find yourself dealing with corroded pipes, or simply want the peace of mind that comes with professional craftsmanship, you do not have to tackle it alone. The highly trained team at Woods Comfort Systems is always here to provide royal treatment and reliable service.
Whether you need fast garbage disposal troubleshooting, emergency drain cleaning, or a brand-new appliance installation, the experienced team at Woods Comfort Systems is ready to help. Schedule professional plumbing services today to ensure your kitchen remains fully functional and leak-free.