What You Need to Know About AC Installation Costs
AC installation is one of the biggest home comfort investments you’ll make, and understanding what drives the cost can save you thousands of dollars.
Here’s a quick breakdown of what most Central Texas homeowners need to know:
| Factor | What to Know |
|---|---|
| Typical cost range | $5,000 to $13,000+ depending on system type and home size |
| Installation time | 4 to 8 hours for a standard replacement; up to 3 days for complex jobs |
| Permit required | Yes, in virtually all jurisdictions |
| System lifespan | 15 to 20 years with proper maintenance |
| Key cost drivers | System size, SEER2 rating, ductwork condition, and labor |
The honest truth is that no two AC installations are identical. Your final cost depends on your home’s size, your existing ductwork, the efficiency level you choose, and local labor rates. Prices can swing dramatically based on those variables, so getting a professional estimate is always the right first step.
If your current system is struggling to keep up with a Central Texas summer, you are not alone. The heat here is relentless, and an aging or undersized system will cost you more in energy bills and repairs than a new installation ever would.
I’m Chris Woods, owner of Woods Comfort Systems, a third-generation HVAC company serving Central Texas since 1956, and I’ve personally overseen hundreds of AC installation projects across the region. In this guide, I’ll walk you through everything you need to know to make a confident, informed decision.

Understanding the Factors That Influence AC Installation Costs
When you begin researching the price of a new cooling system, you will quickly notice that estimates vary widely. This is because every home in cities like Austin, TX or San Marcos, TX has unique heating and cooling requirements. A cookie cutter price quote simply does not work in the HVAC industry.
Several primary factors dictate the final invoice for your cooling upgrade:
- System Size (Tonnage): Air conditioners are sized in tons, which represents their cooling capacity rather than physical weight. A larger home requires a higher tonnage system to move heat out of the living spaces effectively.
- SEER2 Efficiency Ratings: The Seasonal Energy Efficiency Ratio 2 (SEER2) measures how much electricity your system uses to cool your home. Higher SEER2 ratings mean lower monthly energy bills, but the upfront equipment cost is higher.
- Labor Rates and Regional Market: The cost of skilled labor varies by region. In South Central Texas, professional installers must carry specific licensing and certifications to ensure your system is installed safely and legally.
- Installation Complexity: If your new unit fits perfectly onto an existing concrete pad and connects directly to functional lines, your labor costs will be lower. If we need to modify your closet space, run new electrical lines, or install complex attic routing, the labor hours will increase.
To help you navigate these variables, we have outlined AC installation options and costs in Austin, TX to give you a clearer picture of regional pricing patterns.
Below is a general breakdown comparing different AC system types and their typical investment levels:
| System Type | Best Suited For | Cost Range Factor |
|---|---|---|
| Central Air Conditioner | Homes with existing, functional ductwork | Moderate upfront equipment cost |
| Air Source Heat Pump | Homeowners looking for highly efficient heating and cooling in one unit | Higher upfront cost, offset by lower utility bills |
| Ductless Mini-Split | Homes without ducts, room additions, or historic properties | Varies by number of indoor zones |
| Packaged System | Homes with limited indoor space, usually installed on roofs or concrete pads | Moderate to high installation complexity |
Choosing the Right AC System for Your Home
Selecting the right system is not just about choosing the cheapest option on the shelf. It is about matching the technology to the specific layout of your home and your family’s lifestyle. When you look at the options available in Wimberley, TX and Kyle, TX, you will generally choose between four main configurations.
Central air conditioning remains the traditional standard for homes with existing air ducts. These split systems feature an outdoor condenser unit and an indoor evaporator coil, usually paired with a furnace or air handler. They are highly effective at cooling entire homes evenly.
Heat pumps look almost identical to central air conditioners, but they perform double duty. In the summer, they pull heat out of your home to keep you cool. In our mild Central Texas winters, they reverse the process, pulling heat from the outdoor air to warm your home. Because they move heat rather than generating it through combustion, they are incredibly energy efficient.
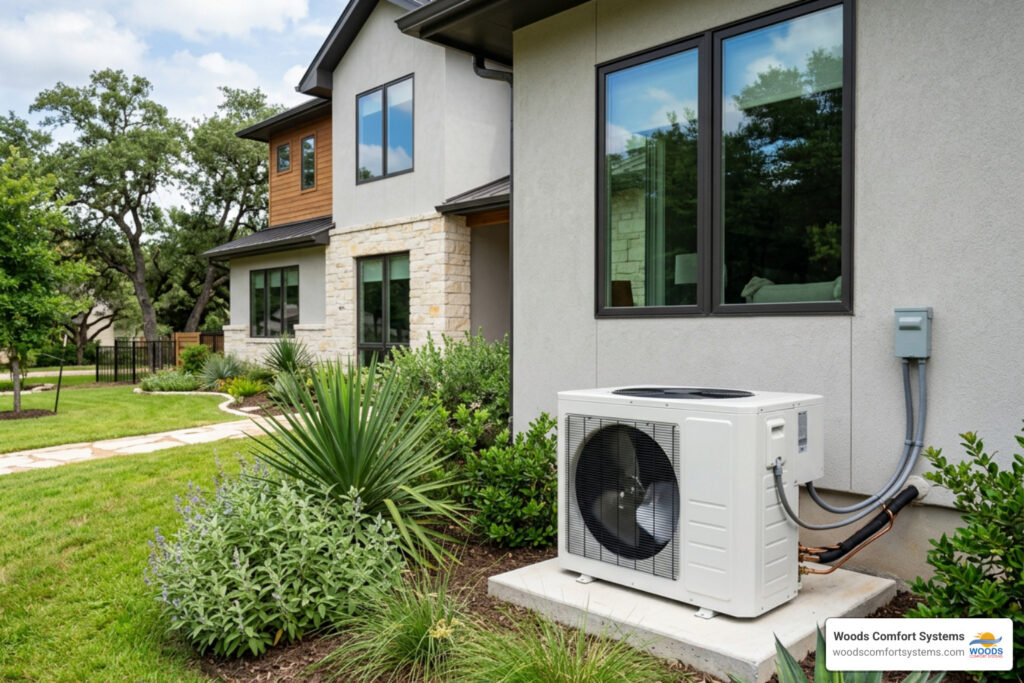
Ductless mini-splits are an exceptional choice for older homes in historic districts, converted garages, or home additions where running new ductwork is impractical. These systems use small indoor air handlers mounted on the wall, connected to an outdoor compressor by a small conduit. They allow for precise zone control, meaning you only cool the rooms you are actively using.
Packaged systems combine all components into a single cabinet located outside. These are common in certain architectural styles where indoor closet or attic space is at a premium.
If you are currently building a property from the ground up, we recommend checking out our expert tips for choosing HVAC system for new home to ensure your structural layout supports the most efficient system possible.
Sizing Your System with a Manual J Load Calculation
One of the most critical mistakes a contractor can make is sizing a system based solely on a rule of thumb, such as square footage. An oversized system will turn on and off rapidly, a process called short cycling, which wears out the compressor prematurely and fails to remove humidity from the air. An undersized system will run constantly, driving up your utility bills while failing to keep you cool on a 100 degree day in New Braunfels, TX.
To find the perfect size, professional technicians perform a Manual J load calculation. This scientific calculation takes into account:
- The total square footage and ceiling heights of your home
- The quality and thickness of your attic and wall insulation
- The number, orientation, and shading of your windows
- Your local climate zone and typical summer temperature extremes
- The heat generated by household appliances and occupants
For detailed technical specifications on how high-quality equipment is designed to operate under these calculations, you can refer to the manufacturer guidelines in the 18-AC98D1-7E-EN_05192023.indd installation manual.
Evaluating Your Ductwork for an AC Installation
Your ductwork is the circulatory system of your home. You can buy the most efficient, high-tech air conditioner on the market, but if your ducts are leaky, collapsed, or clogged, you will waste a significant portion of that cooling power.
Before any new AC installation, a thorough inspection of the duct system is essential. Over time, duct joints can pull apart, and flexible ducting can sag or be damaged by pests in the attic. This leads to poor airflow, uneven temperatures between rooms, and high energy bills.
If your ducts are in poor condition, sealing or replacing them during your installation is the best way of improving indoor airflow circulation throughout your living spaces. If your home lacks ductwork entirely, or if the cost of installing new ducts is prohibitive, a ductless mini-split system provides a highly efficient alternative that bypasses the need for ductwork completely.
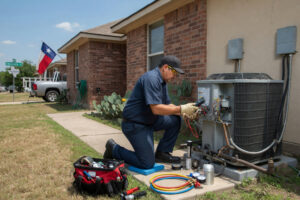
What to Expect During the AC Installation Process
Once you have selected your system and finalized your estimate, it is time for the physical installation. Knowing what happens on installation day can help you prepare your home and minimize disruptions to your schedule.

A professional installation is a highly coordinated project. It is not just about swapping boxes, it involves electrical wiring, high pressure refrigerant lines, and municipal safety codes.
First, a reputable contractor will handle all local permits and inspections. In cities like Buda, TX and Kyle, TX, municipal permits are required for mechanical and electrical work. Skipping this step can lead to fines, void your manufacturer warranty, and cause issues when you try to sell your home.
Second, your electrical system may need an upgrade. Modern high efficiency air conditioners often require different breaker sizes or a dedicated 240V circuit. Your installation team will inspect your electrical panel to ensure it can safely handle the new load.
Finally, the refrigerant lines must be handled with extreme care. Technicians must run copper line sets between the indoor and outdoor units, braze the connections, purge the lines with dry nitrogen, and pull a deep vacuum to remove all moisture before releasing the refrigerant.
For a deeper look at how to get your home ready for the big day, review our detailed guide on what to expect during an air conditioner installation.
Timeline and Steps of a Professional AC Installation
A straightforward, like-for-like AC replacement typically takes between 4 and 8 hours. If your project requires new ductwork, electrical panel upgrades, or complex structural modifications, it can take anywhere from 1 to 3 days.
Here is the typical step-by-step sequence of a professional installation day:
- Property Protection: Technicians lay down drop cloths and wear shoe covers to protect your floors and furniture.
- Decommissioning: The old refrigerant is safely recovered using specialized equipment, and the old outdoor condenser and indoor evaporator coil are disconnected and removed.
- Site Preparation: The outdoor concrete pad is leveled, and the indoor plenum is modified to fit the new coil.
- Equipment Placement: The new indoor and outdoor units are securely mounted and positioned.
- Connection: Refrigerant lines, electrical wiring, condensate drain lines, and low-voltage thermostat wires are installed.
- System Evacuation and Testing: The system is pressure tested with nitrogen, evacuated to under 500 microns to ensure no leaks exist, and charged with refrigerant.
- Thermostat Setup and Walk-Through: The technician installs your new thermostat, starts up the system, measures the airflow, and explains how to operate your new equipment.
To ensure these steps are executed flawlessly, our technicians undergo rigorous training, often collaborating with leading educational institutions like the Central Texas AC and Refrigeration School to master the latest industry standards and safety protocols.
Maximizing Your Investment: Rebates, Financing, and Lifespan
An AC installation is a significant financial commitment, but there are several ways to reduce your upfront costs and maximize your long-term return on investment.

First, take advantage of federal tax credits and local utility rebates. Under the Energy Efficient Home Improvement Credit (Section 25C), homeowners can qualify for federal tax credits up to $2,000 for installing certified high-efficiency heat pumps, or up to $600 for qualifying central air conditioning units. Additionally, local electric cooperatives and municipal utilities often offer cash-back rebates for upgrading to energy-efficient systems.
Second, consider flexible financing options. Many homeowners prefer to preserve their liquid savings by choosing low-interest financing plans with manageable monthly payments.
Third, understand the lifespan of your investment. A properly installed and maintained central air conditioner or heat pump typically lasts 15 to 20 years.
When deciding whether to keep repairing an old unit or invest in a new one, we recommend using the $5,000 rule: multiply the age of your system by the cost of the repair. If the result exceeds $5,000, replacing the unit is generally the smarter financial choice.
To help you plan your budget, you can explore our breakdown of the AC installation cost in San Marcos, TX to see how local factors influence regional pricing.
Post-Installation Maintenance for Long-Term Performance
Once your new system is up and running, your job is not quite done. To protect your investment, keep your utility bills low, and ensure your manufacturer warranty remains valid, routine maintenance is essential.
Fortunately, some of the most critical maintenance tasks are simple enough for any homeowner to handle:
- Change Your Air Filters: Check your filters monthly and replace them every 1 to 3 months. Clogged filters restrict airflow, forcing your system to work harder and increasing wear and tear on the blower motor.
- Maintain Outdoor Clearance: Keep weeds, shrubs, and debris cleared at least two feet around your outdoor condenser unit. The system needs room to breathe to release heat efficiently.
- Keep Vents Clear: Ensure indoor supply and return vents are not blocked by furniture, drapes, or toys.
- Schedule Annual Professional Tune-Ups: Have a licensed technician inspect your system every spring. A professional tune-up includes cleaning the coils, checking refrigerant levels, tightening electrical connections, and testing safety controls to catch minor issues before they turn into costly breakdowns.
Frequently Asked Questions About AC Installation
How much does a typical AC installation cost in San Marcos, TX?
The cost of AC installation in San Marcos, TX generally ranges from $5,000 to $13,000 or more. The final price depends heavily on the size of your home, the SEER2 efficiency rating of the equipment, whether you choose a standard central AC or a heat pump, and the condition of your existing ductwork.
How long does the actual AC installation process take?
For a standard, straightforward replacement where the existing ductwork is in good condition, the installation typically takes between 4 and 8 hours. If your home requires new ductwork, electrical upgrades, or complex structural changes, the process can take 1 to 3 days.
Do I need a permit for a new AC installation?
Yes. Virtually all local jurisdictions in Central Texas require mechanical and electrical permits for a new AC installation. A licensed professional contractor will handle the permitting process, ensuring that the installation complies with all local building codes and passes municipal safety inspections.
How do I know if I need to replace my ductwork during installation?
If your home has uneven temperatures between rooms, high energy bills, excessive dust, or if you can hear whistling noises when the system runs, your ducts may be leaky or damaged. A technician can perform a duct inspection to determine if they can be sealed or if a full replacement is necessary.
What is the difference between SEER and SEER2 ratings?
SEER2 is an updated efficiency rating system that took effect in January 2023. It uses a new testing procedure that more accurately reflects real-world operating conditions, including the static pressure of household ductwork. A SEER2 rating is slightly lower numerically than an older SEER rating for the same level of efficiency, but it represents a more realistic measurement.
Should I choose a central AC or a ductless mini-split?
If your home already has functional ductwork, a central AC or heat pump is usually the most cost-effective option. If your home lacks ductwork, has historic architectural restrictions, or if you want to cool a specific addition or zone, a ductless mini-split is often the superior, more efficient choice.
How long will my new AC system last after installation?
With proper professional maintenance and regular filter changes, a modern central air conditioning system or heat pump typically lasts between 15 and 20 years.
Are there tax credits or rebates available for energy-efficient AC installation?
Yes. Homeowners can take advantage of federal tax credits under the Energy Efficient Home Improvement Credit (Section 25C), which offers up to $2,000 for qualifying heat pumps and up to $600 for qualifying central AC units. Many local utilities in Central Texas also offer cash-back rebates for installing high-efficiency systems.
How do I determine the correct AC unit size for my home?
The correct size can only be determined through a professional Manual J load calculation. This process evaluates your home’s square footage, ceiling heights, insulation levels, window placement, and local climate factors to calculate the precise cooling capacity (tonnage) your home requires.
What should I look for when hiring an AC installation contractor?
Always look for a contractor who is fully licensed and insured, has a long-standing reputation in your local community, employs certified technicians, and provides transparent, written estimates. Avoid contractors who give quotes over the phone without visiting your home to perform a proper load calculation.
Conclusion
Investing in a new air conditioning system is one of the most important decisions you will make for your home’s comfort and energy efficiency. While the upfront costs can seem daunting, choosing the right system size, selecting an optimal efficiency rating, and working with an experienced team will ensure your home remains a cool haven for decades to come.
If you are ready to explore your options, our comprehensive guide to AC installation in Austin, TX can help you take the next step with confidence.
At Woods Comfort Systems, we have spent over 60 years delivering royal customer treatment and dependable comfort solutions to families across Central Texas. Whether you are building a new home or upgrading an aging system, our family-owned team is here to help. Schedule professional HVAC service with us today to request your free, personalized installation estimate.